How to Remove Air Blisters from Rubber Using Vacuum De-airing: Lessons from a 2-Inch Extruder Trial
A 2-inch extruder can pull the air out of a rubber compound and still form a good sheet, as long as the rubber is feeding steadily into the vacuum stage. That was the result of a rubber de-airing trial we ran in October 2026, in the Bonnot test room in Akron, Ohio, for an industrial customer. Here is what we tested, what we saw and what it means for removing air blisters from rubber.
The common assumption about de-airing rubber
Most people who come to us about air in rubber start from the same place. They assume the vacuum chamber does the de-airing, so the question they ask is how strong a vacuum they need. It is a fair starting point, since the vacuum draws the air off.
What the trial showed is that the vacuum can only work on material that is moving through it steadily. If the rubber is not feeding properly, the vacuum has very little to work with, no matter how it is set. In practice, de-airing rubber starts with feeding.
The challenge: removing air blisters from rubber sheet
Air trapped in rubber shows up as blisters and voids. In a formed sheet, those blisters can compromise the integrity of the finished product. That is a defect to find in a test room, long before production.
The customer’s question was simple. Could our de-airing system remove the trapped air from their rubber compound and still produce a good sheet off the die? To answer that, we had to show three things in one run: that the compound would feed through both stages, that the vacuum stage would draw the air off, and that the finished sheet would come off the die without visible blisters.
The test setup: a 2 Series vacuum de-airing system
The trial ran on our 2 Series vacuum de-airing system, a 2-inch machine made up of two extruders working in series.
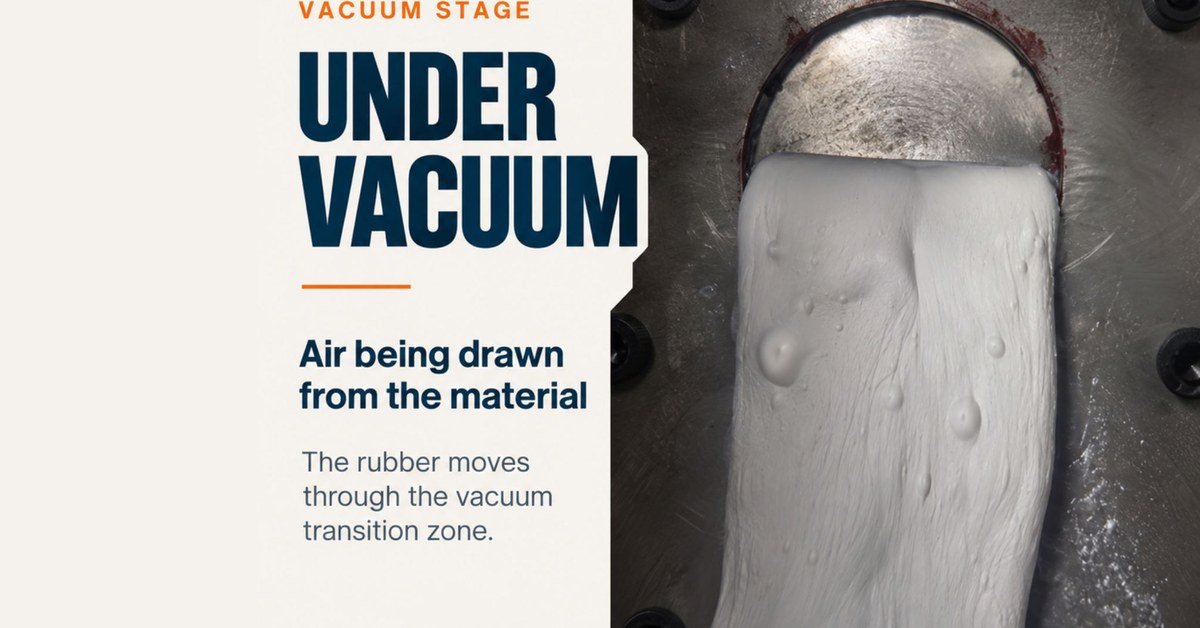
The first stage is a Twin Packer feeder. Two counter-rotating packers in the hopper push the rubber into the feed auger, which moves it into a vacuum chamber. Inside the chamber, the rubber passes through the vacuum transition zone, where trapped air is drawn from the material. The second stage is a grooved-barrel extruder. It picks up the de-aired rubber from the chamber and forms it through a 1/8 in × 5 in fishtail die into a flat sheet.
The layout splits the work. The feeder gets the rubber moving, the second extruder builds pressure and forms the sheet, and the vacuum sits between them.
Running two extruders also gives independent speed control between the feed stage and the output stage. The screw RPM on the feeder and on the second extruder can be adjusted separately, so the rate of rubber going into the vacuum chamber can be balanced against the rate the second stage takes it away. That independent adjustment is often a key to success in a de-airing run.
What we observed in the trial
The rubber would not feed at first
At the start of the run, the rubber would not feed into the second extruder. We had the feeder at 175°F and the extruder at 150°F, and at those settings the material did not make it into the second stage.
We raised the temperatures to 250°F on the feeder and 200°F on the extruder. We then added a die and spacer to the feeder, and the rubber fed much better.
Adding a spacer and breaker plate to the first stage has a second benefit. The breaker plate divides the rubber into smaller streams as it leaves the feeder, which exposes more of its surface area to the vacuum and improves de-airing.
Blisters going into the vacuum stage
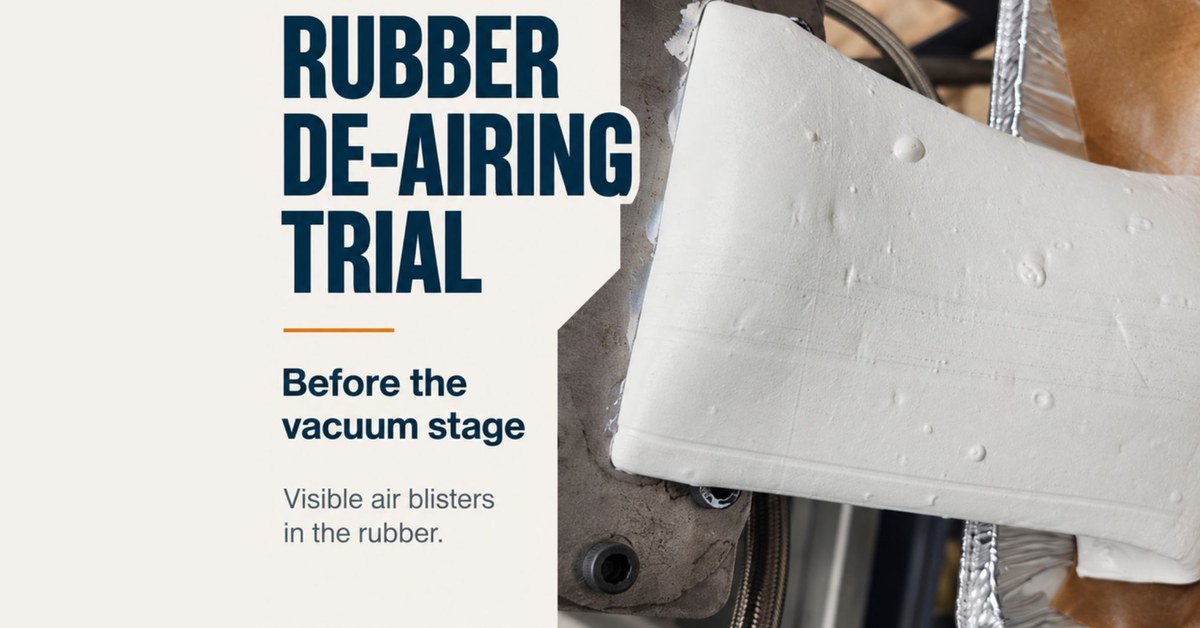
With the die on the feeder, we could see what the feeder was producing. The rubber coming out of the feeder had visible air blisters across its surface as it went into the vacuum stage. That gave us a clear before picture: this is how much air the compound was carrying ahead of the vacuum.
Finished sheet with no visible blisters
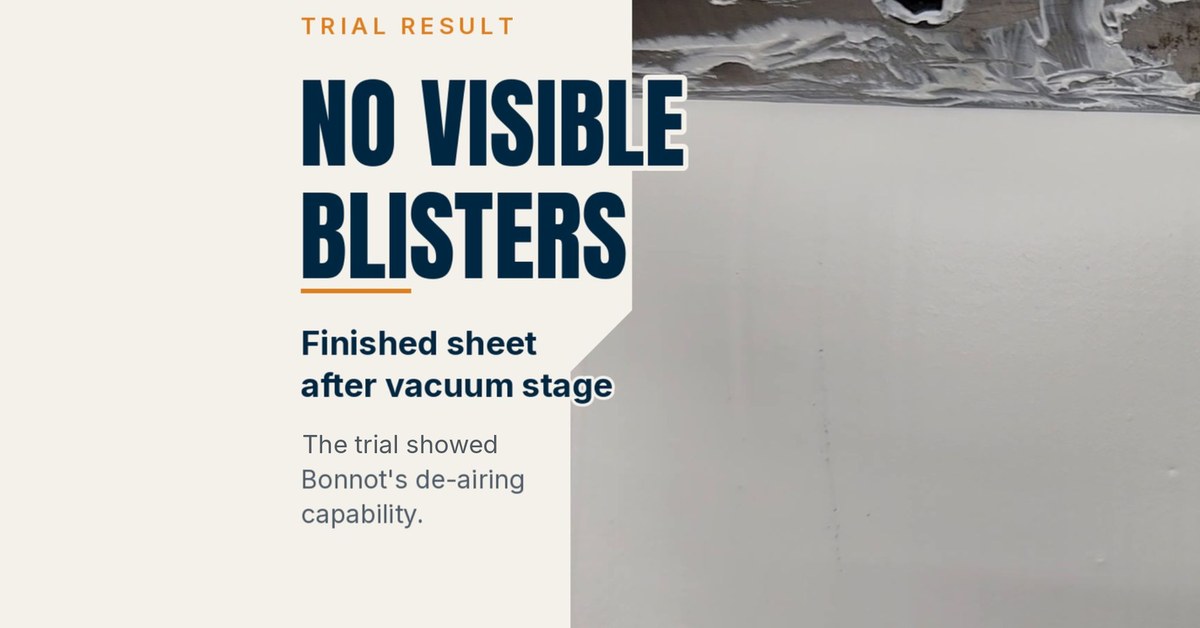
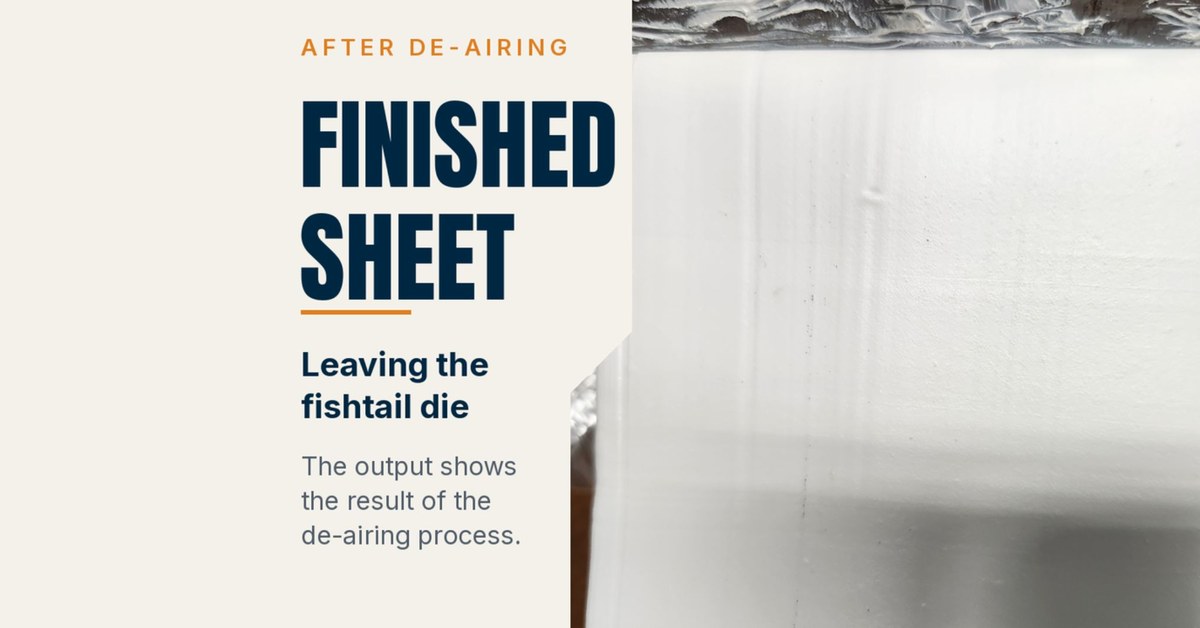
With the rubber feeding steadily and the vacuum running, we produced a good sheet at about 166°F and 8–12 oz/min. By the end of the run, the sheet coming off the fishtail die had no blisters we could see.
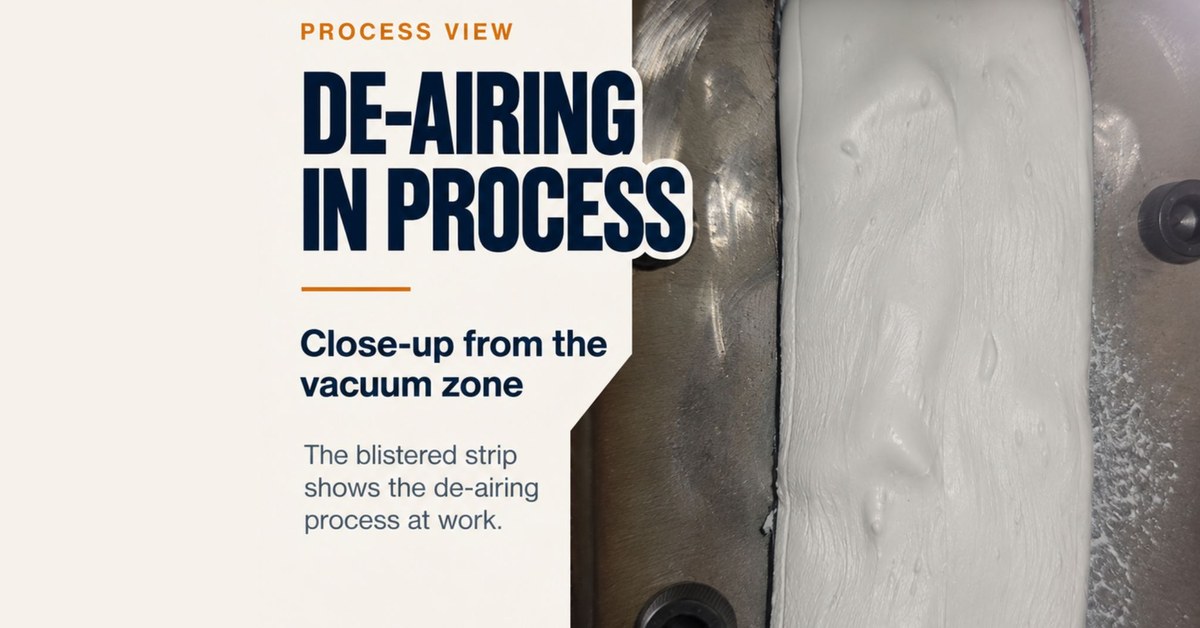
The trial images show the sequence: blistered feeder output, a blistered strip in the vacuum chamber, and smooth sheet at the die.
What is still to come
A clean surface is a strong result, but a visual check cannot confirm what is inside the sheet. Next, we will run the material again to gather scale-up data and complete a density check. That second run will add the numbers needed to support the next equipment decision.
A new lens: rubber de-airing is a feeding problem first
We see this a lot with rubber. Feeding comes first. The vacuum cannot do its job until material moves steadily through the chamber.
This matters because it changes where the attention goes. If a trial produces blistered sheet, the natural reaction is to look at the vacuum. In this trial, the immediate issue was getting the compound into the second stage. Once the feed temperatures were up and the die and spacer were on the feeder, the material moved steadily enough for the vacuum stage to be properly evaluated.
The purpose of extrusion testing for a de-airing application is to prove the whole sequence: feed, vacuum and forming together. Testing the vacuum on its own answers only part of the question.
How this changes equipment decisions
For a processor weighing a vacuum extrusion system, the trial points to a different set of questions to ask before committing to a spec:
- Will the compound feed reliably into the vacuum stage at workable temperatures?
- What changes at the feeder make the biggest difference? In this trial, raising the temperatures and adding a die and spacer to the feeder solved the feeding problem.
- Can the feed and output stages run at different speeds? A dual-stage system with two extruders allows independent screw RPM adjustment on each stage, which is often a key to success.
- What does the finished sheet look like at steady running? Judge the result at the die, after the vacuum stage, once the run has settled.
- What will provide further confirmation? Plan the density check alongside the visual result, and gather scale-up data from the same material.
Key takeaways for rubber processors
- A 2-inch vacuum extruder can de-air a rubber compound and form a good sheet, once the rubber is feeding steadily.
- Feeding is the first problem to solve in rubber de-airing. The vacuum cannot work on material that is not moving. A spacer and breaker plate in the feeding stage expose more surface area to the vacuum, which improves de-airing.
- Independent screw speed control on the feed and output stages, which a two-extruder system allows, is often a key to a successful de-airing run.
- Visible blisters in the feeder output gave a clear before picture, and the finished sheet came off the die with no visible blisters.
- A density check and scale-up data are the next step before a specification is set.
When vacuum de-airing works well for rubber
Vacuum de-airing works best when the material reaches the chamber in a steady, continuous flow and the second stage can pick it up and build pressure to form the product. It needs more work when the compound will not feed at the starting temperatures, which is why a test room run is worth doing before buying equipment. Every compound behaves differently, so treat the settings that worked here as a starting point.
How Bonnot can help
The Bonnot Company has designed and built custom single-screw extruders in Akron since 1891. If you are not sure how much air you can get out of your rubber compound, send us a sample. We will run it in the Bonnot test room in Akron and show you how it feeds, how it de-airs and what the finished product looks like before anyone commits to a spec.
Call (330) 896-6544, email info@thebonnotco.com or visit www.thebonnotco.com to set up a test room trial.
The short version: in rubber de-airing, get the feed right first, and the vacuum can do its job.

Frequently asked questions
How do you remove air blisters from rubber?
One method is vacuum de-airing during extrusion. In this trial, the rubber passed through a vacuum chamber between two extrusion stages, where trapped air was drawn from the material before the sheet was formed. The finished sheet came off the fishtail die with no visible blisters once the rubber was feeding steadily. A spacer and breaker plate in the feeding stage also help, because they expose more of the rubber’s surface area to the vacuum.
What is a vacuum de-airing extruder?
On the Bonnot 2 Series system used in this trial, two extrusion stages operate in series with a vacuum chamber between them. A Twin Packer feeder moves rubber into the chamber, and a grooved-barrel extruder picks up the de-aired rubber and forms it through a die. Because the two stages are separate extruders, the screw speed of each stage can be adjusted independently.
Why won’t my rubber feed into a vacuum extruder?
Temperature and feeder setup can affect feeding. In this trial, the rubber would not feed at 175°F on the feeder and 150°F on the extruder. Raising them to 250°F and 200°F and adding a die and spacer to the feeder improved feeding. Every compound behaves differently, so these settings are a trial result, not a universal rule.
Does a smooth sheet mean all the air is out?
Not on its own. A visual check confirms the surface condition, but it does not confirm what is inside the sheet. A density check is planned as the next step for this material to provide further confirmation alongside scale-up data.
Who makes custom single-screw extruders for rubber de-airing?
The Bonnot Company in Akron, Ohio, designs and builds custom single-screw extruders, including the 2 Series vacuum de-airing system used in this trial. Bonnot also runs customer materials in its Akron test room before equipment is specified.
How can I test whether my rubber can be de-aired?
Send a sample to the Bonnot test room in Akron. Bonnot can run the material and show how it feeds, how it behaves through the vacuum stage and what the finished product looks like before anyone commits to a specification.
Call (330) 896-6544 or email info@thebonnotco.com